I have always been a big fan of classic Thinkpads. So much so, that most of my current work machines are Thinkpads. This article has been largely typed up on my T520.
Some time ago, I was gifted a collectible ThinkPad ‒ a 770X released somewhere around 1998. It is definitely a little ancient by modern standards, but was quite a powerhouse in its day, with a value of around $4800.
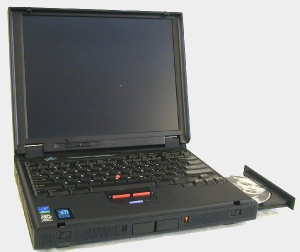
Here is a nice little image of the unit, along with specs that I shamelessly copied from ThinkWiki. I tweaked the specs a slight bit to match my own configuration.
Without further ado, here is what I managed to do.
First of all, the usual old machine woes. First two things I noticed when I tried to boot the machine were errors 161 and 163, signifying a dead CMOS battery. The 770X refused to boot any further, so I plugged in a fresh CR2025 in there.
Next, I booted it again to find that the machine now reports a completely different value for available memory. I fixed the BIOS clock and fired up a copy of Memtest Plus. Sure enough, the two 128 MB sticks that came with the machine were pretty dead. I ordered a pair of 256 MB sticks, as the unofficial memory specs totally allow a max of 512 MB (the built-in 64 MB don’t click in due to chipset limitations). After the sticks arrived, the machine refused to boot with both of them in there. It didn’t take me too long to realize why.
The machine came with a slightly out of date BIOS, the IIET32WW dated around 1998, with the newer version, the IIET42WW available. Fortunately, Lenovo provides the End-Of-Life Product Resources page, that has the BIOS update. _Un_fortunately, the update is wrapped in a diskette package to be launched from DOS.
Using DOSBOX or anything similar wasn’t a good option. The diskette package requires another floppy available and refused to eat a virtual one.
I had to find myself a floppy drive, install it into my other machine and boot FreeDOS from a USB stick. Fortunately, I had a spare floppy that actually worked and the process went through smoothly.
The 770X I have lacked a floppy drive and I had no USB adapters at the time, so I resorted to using the El Torito Bootable CD Specification.
After converting the floppy IMG to an ISO, I burned it to a CD. The upgrade process went through just fine as well and after that my full 512 MB worth of memory became usable.
To save anybody the time and pain of going through the same processes, I uploaded the extracted images to this website.
Time to purge the preinstalled Windows 98 and update the 770X to something more modern.
systemd doesn’t seem to support init on old hardware all that well. Any of the systemd-less distros should go well though. I went with Devuan at the time, though today I would probably use Void.
Devuan is only distributed in netboot images, so I needed some form of Internet access to proceed with the installation. The built-in MWave DSP modem can’t really be called “access” these days, so I went on a hunt for a CarBus Wi-Fi adapter with good GNU/Linux support. Most of those are 802.11g only and don’t support WPA2 protected access points, but after some searching I came upon the NETGEAR WN511B RangeMax, an 802.11n adapter using a Broadcom chip.
HJ Heins’ Directory lists the WN511B as being fully supported by the bcm43xx driver, which is now called simply b43.
The Devuan installation went almost without a hiccup, sans for the fact that the wireless adapter required binary firmware to run. The OpenELEC project provides the necessary files, so it is possible to obtain the binaries without relying on a Broadcom downloader. I had to download the b43 folder, put it inside the “firmware” directory on a USB stick and then plug the USB stick into the ThinkPad. This is likely a Debian/Devuan only issue, though I could be wrong.
No further non-standard interaction was required for the installation.
The process took about two hours, I installed a fairly minimal system with Xorg tagged along with it.
Contrary to some other reports on the Internet, Xorg did not work out of the box. An attempt to start it without configuration ends with Xorg crashing without any recovery other than a reboot.
The Trident page on the Arch Wiki provides a 99-trident.conf file to be copied to /etc/X11/xorg.conf.d/. Uncommenting all the options except for the AccelMethod gets you a working Xorg server.
Unfortunately, Xorg doesn’t seem to recognize the full 1280x1024 resolution of the display, even with the timing option adjusted accordingly. So far I haven’t found a workaround.
The machine is fairly usable today. I love the classic ThinkPad keyboard layout and the TrackPoint. 512 MB of RAM is a little on low side, but not too bad for most lightweight programs. The biggest deal breaker is the low resolution with the X server. It doesn’t look right and it’s a shame the whole display can’t be used.


